ARTicles
“It’s beginning to look a lot like Christmas” – Using your very own Artwork on Christmas Cards for Family and Friends
Producing Christmas cards from your own watercolour paintings

It’s that time of year again, when we start to give and receive cards that send messages and greetings for the Season. The giving and receiving of Christmas cards are now firmly embedded in Christmas tradition, as one of the milestones of December, along with getting the decorations out the loft, putting up the tree, making sure close family and friends have a gift and buying the Christmas feast. Christmas is already something special, or so we are told, but it could be even more special for our family and friends and indeed ourselves, if we send Christmas cards that are emblazoned with our own paintings and so add a little more magic to the mix.
These days I send around 40 Christmas cards each year, so for me, painting each one individually is not an option, so I decided to have images of my original paintings printed by a custom printer, onto my own professionally produced Christmas cards.
I thought it would be good to share my experience and show you how I went about getting my very own Christmas cards. In doing so, I have obviously used equipment that I have, an editing application that I use and know how to use and have chosen one particular on-line custom printer to produce my cards. I hope it goes without saying that there are other cameras, editing software and custom printers available to use and I am sure you have your own preference, but this ARTicle is how I went about the task, so of course, I will describe my experience in the hope that you find it useful.
Choosing and photographing the images
We were lucky to have some snow last week and so that inspired me to paint scenes from our local area in an abstract landscape style. I set out to paint them using a limited palette of Anthraquione Blue, Charcoal Grey and a thin wash of Cadmium Orange. The following day the snow had melted and the sun was shining brightly, so I looked to capture this in the painting “Winter Sunshine”, where I used Transparent Iron Oxide Yellow to create the golden glow of the sun through the trees. Each was painted using a wet-in-wet technique, in order to create the hazy sunlight that is so evident at this time of year. I enjoyed painting them and thought that although simple, their abstract nature would look good as Christmas cards.

Figure 1: My abstract landscape watercolour paintings, “Trees in the Snow”, “Winter Trees” and “Winter Sunshine”.
My first step was to photograph each painting, to obtain a high-resolution image. I used a Canon EOS 600D digital single lens reflex (DSLR) camera to obtain an image at 300 pixels per inch, taking each photograph in natural daylight. I have used my phone before, which produces nice images, but their resolution tends to be 72 pixels per inch, which will have an impact on the clarity of the finished result.
Photo editing
I transferred the images to my computer, where I could edit each and prepare them for printing onto cards. I used Photoshop Elements to process my digital images using the following steps:
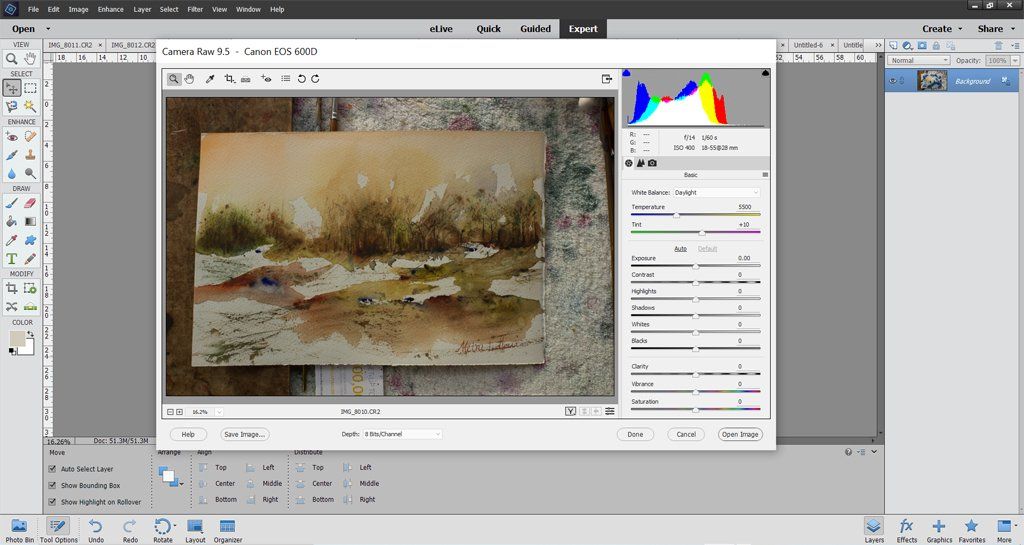
Step 1: Correcting the white balance of each image;

New paragraph
Step 2: Adjusting the colour of each image;
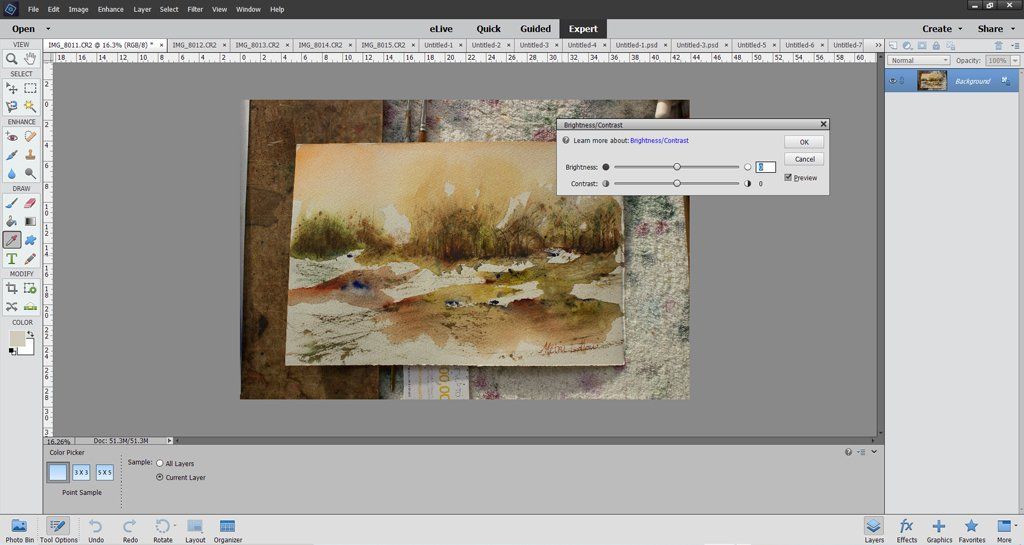
Step 3: Adjusting the brightness of each image;
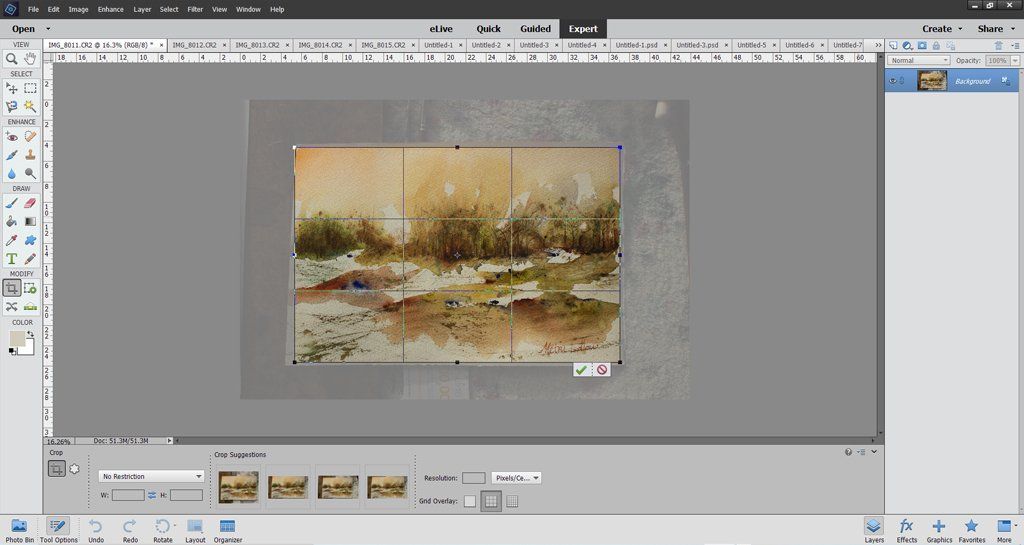
Step 4: Cropping each Image
Preparing the Card design
It was at this point that I needed to go to the on-line custom printer’s website and see what size and card designs I could have. I decided to produce “Winter Sunshine” as an A5 card with horizontal fold at the top of the image (my printer identifies this as a “tent fold”), “Winter Trees” as an A6 “tent” folded card and “Trees in the Snow” as a 148 x 148mm card with a vertical fold on the left-hand side of the image (my printer identifies this as a “half fold”).
I then looked at each card template for the correct sizing requirements and noticed that the printer recommends a “bleed” margin of 3mm around edge of the card and a “safe area” of 5mm within the edge and either side of the fold. The “bleed” area is important to allow the image to extend beyond the edge of the card and so avoid any unwanted white borders, whilst the “safe” area is there to ensure artwork or text remain within the trimmed borders.
I intend my paintings to completely fill the front of the card and so needed to include the “bleed” area in my design. Therefore in photoshop, I created a template for each face of the three cards, and then the whole card itself.
The “bleed” margin requires a 3mm strip around the edge of the card, and so I had to extend the face dimensions; for example, for the 148 x 148mm card, the front face was extended to 154 x 151mm (figure 2). The image was then manipulated to fit (figure 3) and then finally the front face and rear face fitted to form the complete card (figure 4). I had already decided not to have a printed message inside and so each card only requires one side to be printed.
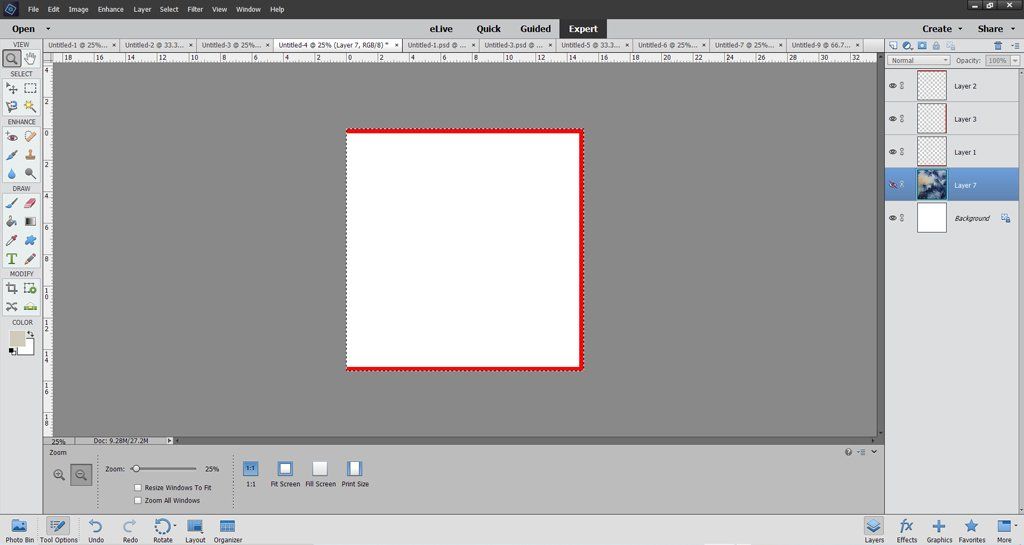
Figure 2: Creating the “bleed” area around the edge of the front face.

Figure 3: Ensuring the image fills the whole face.
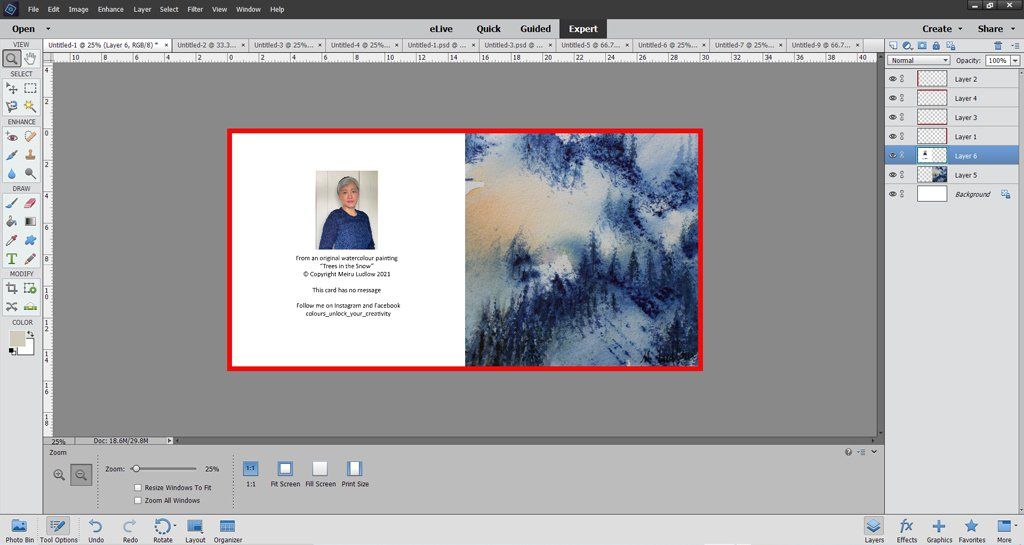
Figure 4: The completed design including painting description to the reverse of the card and the “bleed” area around its edge.
The finished designs

Figure 5: “Winter Sunshine” A5 Christmas card design

Figure 6: “Winter Trees” A6 Christmas card design

Figure 7: “Trees in the Snow” 148 x 148mm Christmas card design
I submitted my designs as JPEG files and ordered 25 cards of each design. When they are printed and dispatched, they will come with envelopes, ready for me to write my Christmas message in and send to my friends and family.
I hope you have found this ARTicle interesting. I have also produced other greeting cards form my watercolour paintings. Again, I leave the inside blank and sell them when I open my studio or when I exhibit. I have taken a conscience decision not to wrap the card and envelope in plastic, as I feel it unnecessary to do so because I tuck the flap of the envelope inside and push the back of the card into the envelope. In my own small way, I hope that by not wrapping my card in cellophane I am reducing the amount of waste packaging I am producing.
That then leaves me and all the rest of us at A J Ludlow Colours, to wish all of you a very Merry Christmas and a happy, healthy and wealthy new year.

