ARTicles
Tips for Practicing Traditional Watercolour Techniques
Part 2
Just starting out or a seasoned watercolourist, it is fun to go back to basics and “play” with your watercolours
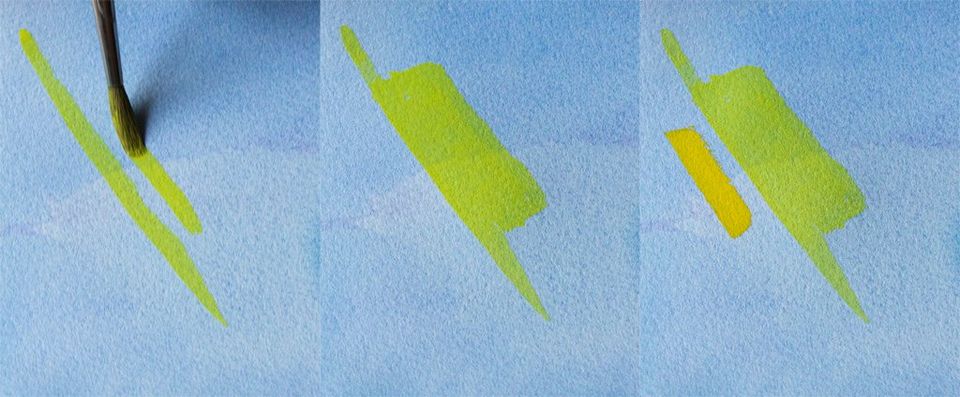
Figure 1: Brushing a transparent wash and more concentrated Cadmium Yellow, over a dried dilute wash of Prussian Blue (both are Professional Watercolours from A J Ludlow).
The reason to exercise this technique for me, is to determine which colours do not lift and contaminate the over painted ones and the resulting layer’s colour. Different concentrations and whether the watercolours are transparent or opaque will have a big difference on the result.
An interesting adaption of this technique is splattering, flicking small droplets of watercolour randomly over dried watercolour. This technique can create interesting patterns on and off the painting, so care is needed to protect the area on the painting where the splatter pattern is not required (see the central photograph in figure 2, where a sheet of paper is used to protect the rest of the painting) and to keep the work area in the studio clean.
Figure 2: Creating the sense of wild flowers splattering and flicking droplets of watercolour.
Creating and Preserving White – simple but useful techniques for keeping the watercolour paper clear of colour:
There are a number of terms used to describe this action including:
- “reserved white” – leaving an area of the paper untouched;
- “stopping out” – protecting a part of the paper with water-resistant materials;
- “wet removal” – lifting wet paint out using a variety of tools;
- “dry removal” – scraping or scratching dry paint away.
“Reserved white” is fairly self-explanatory and is what watercolourists try to do normally to achieve highlights, leave the area clean of colour.
“Stopping out” uses materials that cover the paper and so preserve its whiteness. These materials include rubber latex based art masking fluid, masking tape, wax and the more traditional gum Arabic solution. Each has its own positives and negatives, for example, masking fluid and tape are removable, but are prone to damaging the surface of the watercolour paper, whereas wax is a permanent mask and gum Arabic can be removed, but requires dissolving from the paper and so care is required not to disturb the surrounding area as the gum is washed away.
To use wax, draw on the paper with a non-coloured wax crayon or candle (see figure 3), then when the area is painted over, the watercolour is repelled by the wax. Wax can also be used in the same way, to protect the colour of an earlier layer (the bottom two photographs in figure 3).
Figure 3: Using wax to mask the white of the paper (top) and under colour (bottom).
Un-diluted gum Arabic solution (approximately 35% to 45% gum solids) can be used as a mask either by painting out on the paper using a brush, or drawn out using a dip pen. Once completely dry, the area can be over painted, in this case using a series of washes (figure 4).
Figure 4: Using gum Arabic to mask the white of the paper.
The area masked by gum Arabic can be over painted, but the gum needs to be carefully washed away.
“Wet removal” and the success using this technique, are very dependant on the surface nature of the paper and whether the watercolour is saining or non-staining. A paper that has been well coated with size to prevent the watercolour seeping into the paper’s fibres too quickly, will be better for wet removal. Likewise, a non-staining colour will be better than one where the pigment particles penetrate the paper’s surface and get trapped in its fibres.
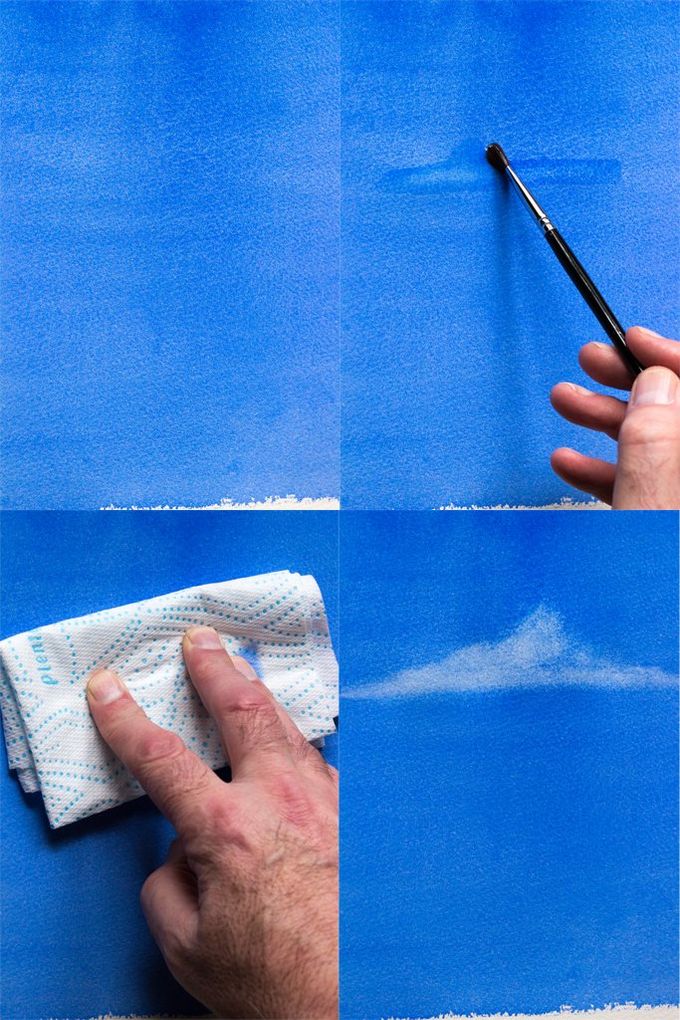
“Wet removal” can be done, either whilst the paint is still wet or after it has dried. When the colour to be removed is still wet (immediately after application) use a clean damp brush to lift colour out, wiping the colour on a damp tissue to clean the brush or by dabbing the area with a dry cloth or tissue. In figure 5, the base colour has dried and so it is necessary to first wet the area to be removed using a clean wet brush. Once the area is wet, the watercolour is removed by dabbing with a dry tissue.
Figure 5: Creating a cloud using the “wet removal” technique after the base colour has dried.
“Dry removal” using a sharp knife blade and coarse glass paper is shown in figure 6. Care is needed (and this is where experience and technique are required) not to damage the surface too much.
Figure 6: Creating flying gulls and wave tips using a sharp knife and glass paper.
Charging – applying wet colour into the middle of a wet area of another colour:
Arguably a wet-in-wet technique, where the wet colour is introduced into an area of wet watercolour. It differs from mingling, as the wet colour flows out from where it is added and creates a boundary of tendril like patterns, the severity of which, depends on how wet the added colour is compared to the watercolour already applied. A similar effect can be created by adding clean water to wet area of applied colour.
Figure 7: Charging A J Ludlow’s Cobalt Turquoise Professional Watercolour to a damp granulated wash of Phthalo Blue (GS).
This effect is often not wanted when created accidently and can be responsible for blooms and back runs if a wash is not completely dry before further painting in the area. However, it can create a very interesting effect. In the first photograph in figure 2, the deep blue line which looks like hills in the distance has been created by feeding A J Ludlow’s Dioxaine Violet into a wet flat wash of Cobalt Blue and allowing it to flow, pushing the displaced cobalt blue pigment before it.
Contemporary Playfulness:
Creating “pigment traps”:
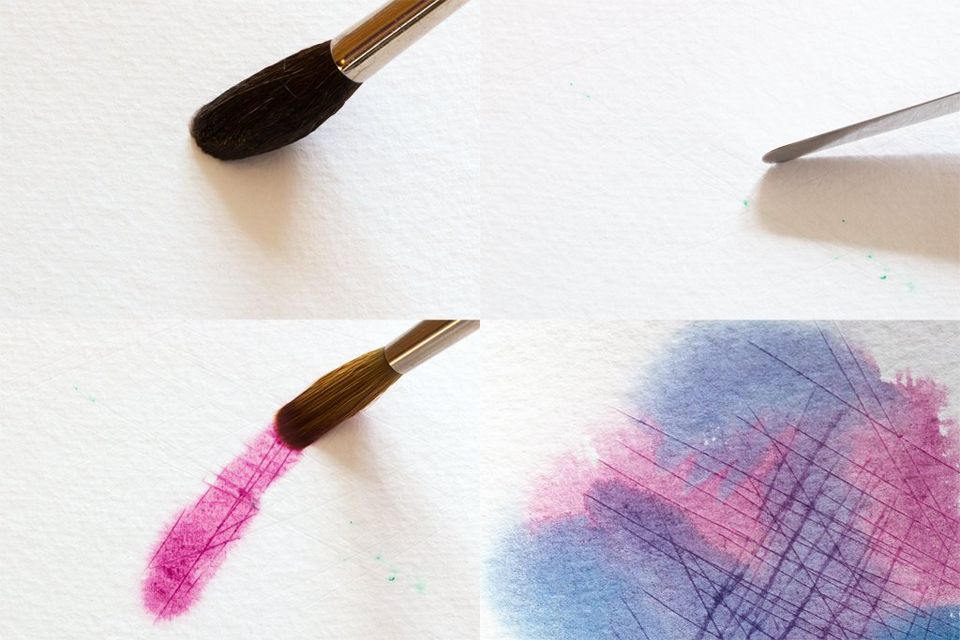
Scratching with a palette knife when the paper is wet, produces grooves in the paper, which can act as “pigment traps” when over painted. In figure 8, the grooves have trapped both the pigment’s in Manganese Mauve and Prussian Blue, giving a series of dark lines in the variegated wash.
Figure 8: Creating an interesting effect by scoring wet watercolour paper and over painting with a variegated wash of Manganese Mauve and Prussian Blue Professional Watercolour.
Making textured marks:
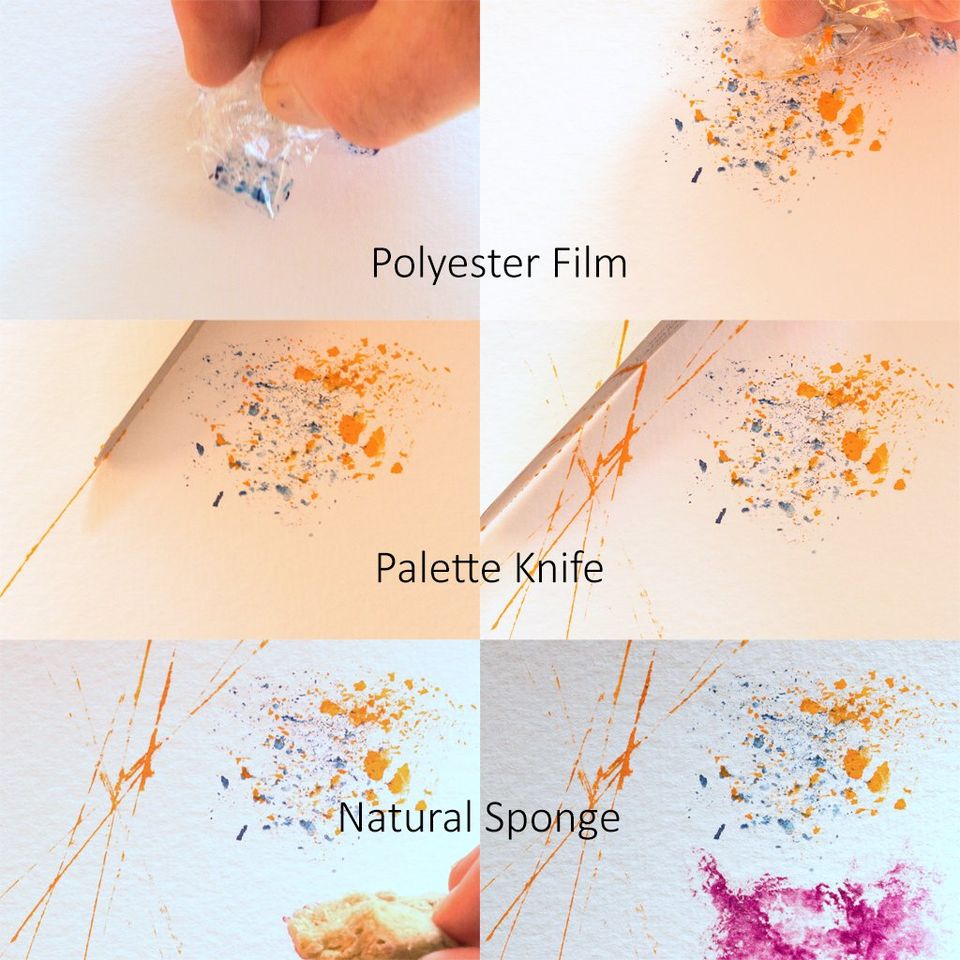
In figure 9, a small selection of items has been used to make marks on dry watercolour paper. In the top two photographs I used crinkled up thin polyester (or “cellophane”) film to produce a stippled pattern, by dipping the film in wet watercolour and then dabbing it on dry watercolour paper. In the middle two photographs I used the edge of a palette knife blade to draw the Cadmium Orange watercolour lines, after first painting the blade edge with the watercolour. The final set of two photographs show a natural sponge being used with Manganese Mauve Professional Watercolour.
Figure 9: Making a variety of marks with different tools on to dry watercolour paper.
Cellular patterns:
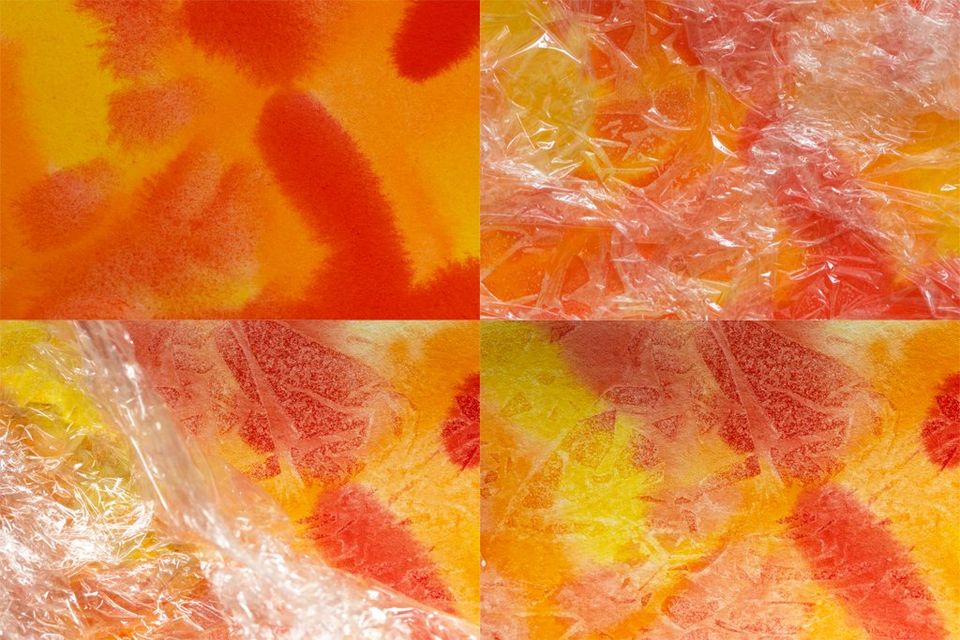
An interesting effect that can look like rock formations is created by covering a wet wash (in the case of figure 10, a variegated wash of Cadmium Orange, Cadmium Lemon Yellow, Cadmium Yellow and Cadmium Scarlet) with scrunched up food wrap (or “cling film”), allowing the wash to dry and then peeling the film off.
Figure 10: Using scrunched up food wrap to create a cellular pattern.
Whilst in the contemporary mood anything goes, but I would suggest drawing the line using household items and materials that may attack or degrade the watercolour paper, or be harmful to the artist’s health. Afterall, we don’t want to use a technique that puts our health at risk or once we’ve created and sold a valuable painting, have it returned because it is disintegrating or changing colour!
As in last month’s ARTicle, I urged you not to just read about these techniques, but to get on and try them yourself. Well, halfway through, my inspiration took over and instead of just practicing a few exercises, I started to develop a simple idea into a painting; the temptation was just too great!

